
Table of Contents
- What Is Paint Decontamination and Why It Matters
- Iron Fallout Remover for Cars: Chemical Decontamination
- How to Use a Clay Bar Safely
- How Often to Clay Bar a Car
- Common Mistakes Beginners Make
- Decontamination and Paint Protection
- Conclusion
- Frequently Asked Questions
Last Updated: 23 September 2026
What Is Paint Decontamination and Why It Matters
Paint decontamination is the process of removing bonded contaminants from your car’s surface that washing alone cannot shift. These particles embed themselves into the clear coat, brake dust, industrial fallout, tree sap, tar, and microscopic metal fragments from road wear. Left untreated, they corrode the paint and create a rough, dull finish that no amount of polish can fix.
Your car’s paintwork faces constant assault. Every journey deposits particles that sit on the surface like invisible sandpaper. A standard wash removes loose dirt, but the stubborn stuff stays put. That’s where decontamination comes in. It prepares your paint for protection, whether that’s ceramic coating or paint protection film, and restores the smooth, glossy finish your vehicle deserves.
Most vehicle owners underestimate how much contamination builds up between washes. A car parked near a busy road or in industrial areas accumulates fallout rapidly. Even careful drivers see deposits accumulate. The good news: decontamination is straightforward once you understand the two main methods.
Iron Fallout Remover for Cars: Chemical Decontamination
Chemical decontamination targets specific particles, mainly iron and metallic dust, that stick to paint. These removers dissolve contaminants chemically rather than scrubbing them away mechanically.
How Chemical Removers Work
Iron fallout removers work through a chemical reaction. The formula dissolves ferrous particles embedded in your clear coat. Most quality removers include a colour-changing indicator. The product turns deep red or purple when it reacts with iron particles. This visual feedback tells you the product is working and when to rinse.
The best chemical removers are pH-neutral. This means they clean effectively without damaging your paint or surrounding surfaces like rubber seals and glass. A good product clings to vertical surfaces, giving the chemicals time to work before you rinse.
Application is simple: spray the product onto clean, dry paint. Let it dwell for a few minutes while the colour change shows the reaction happening. Then rinse thoroughly with clean water. The entire process takes 15 to 20 minutes for a full car.
Best Chemical Products for Beginners
For beginners, start with products that offer clear visual feedback and straightforward application.
Autoglym Magma is widely available across the UK and costs around £13. The colour change from clear to deep red is unmistakable. It works on all exterior surfaces including wheels and glass. Application is spray-on, wait, and rinse, no special technique required. The main limitation: it’s less effective against heavy tar deposits, though it handles brake dust and industrial fallout well.
CarPro IronX (around £15.95) is a professional-grade option that delivers excellent results. The pH-balanced formula is safe for all clear coat finishes. It has a strong, pungent smell during application, so work in a well-ventilated area or outdoors. The colour change is dramatic and easy to see. This product handles stubborn fallout better than budget alternatives.
Gtechniq W6 (approximately £16.50) offers a gel-like consistency that clings to vertical surfaces longer than liquid sprays. This extended dwell time means the chemicals work harder. It’s safe for paint, glass, and wheels. The trade-off: you must rinse thoroughly to avoid residue, and it requires slightly more attention than spray-and-rinse options.
Gyeon Q2M Iron (around £12.50) is ideal if your car has matte or satin paintwork. Most iron removers are safe on matte finishes, but this one is specifically formulated for delicate surfaces. It reacts quickly and includes excellent spray trigger control for even application. The bottle size is smaller than competitors, so you’ll need to plan accordingly for larger vehicles.
For your first decontamination, choose a product with clear colour-change feedback. Autoglym Magma or Gyeon Q2M Iron are excellent starting points. Both are forgiving, effective, and widely stocked.
How to Use a Clay Bar Safely
A clay bar removes contaminants mechanically through gentle abrasion. Unlike chemical removers that dissolve particles, clay physically lifts them from the paint surface. It’s a tactile, hands-on method that gives you direct feedback as you work.
Preparing Your Vehicle
Start with a clean car. Wash your vehicle thoroughly with two buckets, one with soapy water, one with clean rinse water. Dry completely with a microfibre towel. Any grit left on the surface will scratch the paint when you apply the clay bar.
Prepare your workspace. You need shade or an overcast day. Direct sunlight dries the lubricant too quickly, making the clay drag across the paint. This causes scratches. If you must work in sun, work one panel at a time and keep the lubricant spray bottle close.
Gather your materials:
- Clay bar (or clay mitt alternative)
- Lubricant spray (included in most clay kits or purchase separately)
- Microfibre towels (at least two)
- Bucket of clean water
- Optional: second person to help with application
The Clay Bar Technique
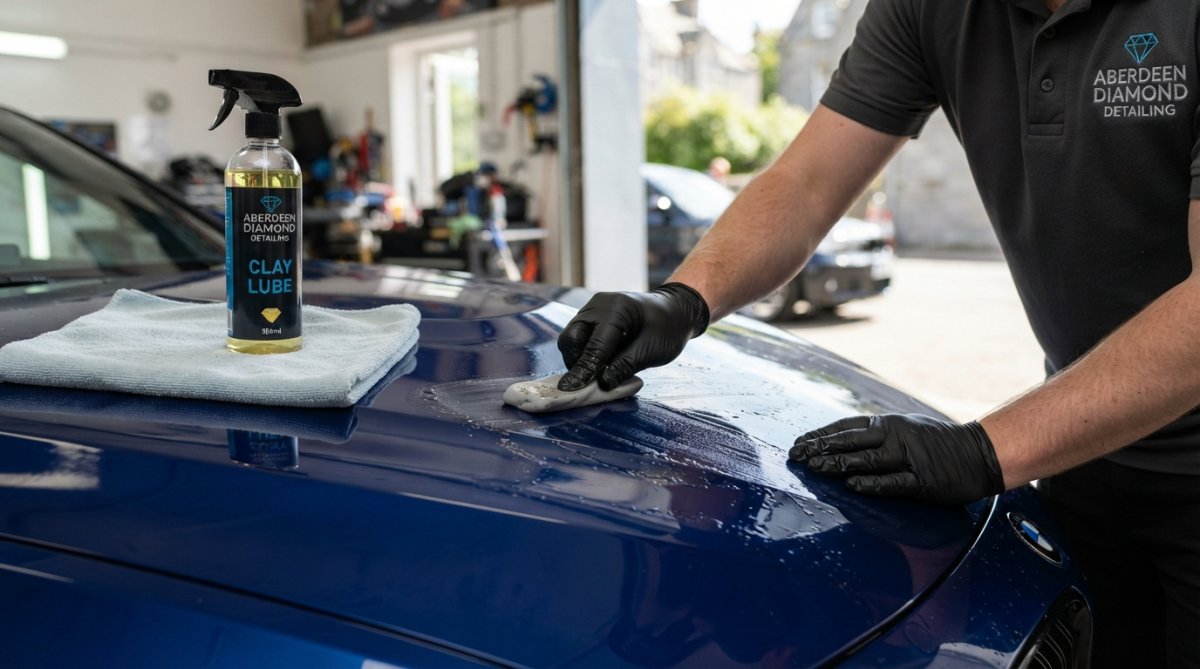
Spray a generous amount of lubricant onto a small section of paint, roughly 60 by 60 centimetres. This might seem excessive, but the lubricant is crucial. It allows the clay to glide smoothly without dragging.
Knead the clay bar into a flat, palm-sized pad. If it’s fresh from the packet, it’ll be stiff. Work it in your hands for 30 seconds until it softens. Flatten it into a shape that fits your hand comfortably.
Place the clay bar on the lubricated section and move it with light pressure in straight lines. Don’t scrub in circles. Work methodically across the panel. You’ll feel the clay grab slightly as it lifts contaminants. This sensation is normal and means it’s working.
After 4 to 6 passes across the same area, fold the clay to expose a clean surface. If the clay becomes visibly dirty, knead it to bury the contaminants inside. If it becomes too contaminated or sticky, discard it and use a fresh bar.
Wipe the area with a clean microfibre towel before moving to the next section. Repeat the spray, clay, and wipe process across the entire vehicle. The bonnet and roof typically need more passes than side panels.
Never drop the clay bar on the ground. If you do, discard it. Picking it up and reusing it risks embedding grit that will scratch your paint.
Aftercare and Inspection
After clay barring, your paint should feel glass-smooth. Run your hand across the surface, it should glide without any roughness. If you feel grit, you’ve missed contamination. Repeat the process on that area.
Rinse the entire vehicle with clean water. Dry thoroughly with a clean microfibre towel. Your paint is now bare and unprotected. This is the ideal time to apply ceramic coating or other protection. Don’t leave the car unprotected for extended periods.
How Often to Clay Bar a Car
The frequency depends on your environment and how much contamination your car encounters.
Most cars benefit from clay barring twice per year, once in spring and once in autumn. This schedule handles typical UK conditions and typical driving patterns. If you park under trees, live near industrial areas, or drive motorways frequently, increase to three times per year.
New cars don’t need clay barring immediately. Wait until your first year is complete, then start a regular schedule. Cars with existing ceramic coating should be clay barred annually, before the coating is reapplied or refreshed.
Signs that your car needs clay barring:
- The paint feels rough or gritty to your touch
- Water beads don’t form evenly across the surface
- The finish looks dull despite recent washing
- You notice visible spots or specks that washing doesn’t remove
If your car is garaged and driven sparingly, you might extend the interval to once yearly. High-mileage daily drivers in urban areas may need clay barring every three months.
Common Mistakes Beginners Make
Understanding what not to do prevents damage and frustration.
Using clay bars on dirty paint. This is the most common error. Grit trapped between the clay and paint creates scratches. Always wash and dry your vehicle first. Rushing this step ruins the entire process.
Applying clay without adequate lubricant. The lubricant allows the clay to glide. Without it, the clay grabs and drags, causing marring. If the surface dries during application, stop and reapply lubricant generously.
Using excessive pressure. Clay bars work through light contact, not force.
Decontamination and Paint Protection
Decontamination prepares your paint for long-term protection. Chemical removers and clay bars clean the surface, but they don’t protect it.
Conclusion
Paint decontamination removes stubborn particles that washing misses. Two methods work well for beginners: chemical removers that dissolve iron and fallout, and clay bars that mechanically lift contaminants. Chemical removers are faster and require less physical effort. Clay bars are more thorough and give you tactile feedback.
Frequently Asked Questions
What is car paint decontamination?
Paint decontamination reremoves bonded contaminants from your vehicle’s surface, including iron particles from brake dust, industrial fallout, and road grime. These particles embed themselves into the paint’s pores and cannot be removed by washing alone. Decontamination uses either chemical removers or mechanical methods like clay bars to lift these contaminants, leaving the paint smooth and ready for protection treatments like ceramic coatings or paint protection film.
Is iron fallout remover safe for all car paint types?
Most iron fallout removers are pH-neutral and safe for standard clear coat finishes. However, if your vehicle has a matte or satin finish, you should verify the product is suitable before application. Products like Gyeon Q2M Iron are specifically formulated for sensitive finishes. Always test any chemical remover on a small, inconspicuous area first. Read the manufacturer’s instructions carefully, as some products require thorough rinsing to prevent residue or staining.
How often should I decontaminate my car paint?
Most vehicles benefit from decontamination twice yearly, typically in spring and autumn. Cars exposed to harsh conditions, such as those parked near industrial areas or subjected to heavy Scottish weather, may need quarterly decontamination. If you notice your paint feels rough or gritty to the touch, that’s a sign contaminants have accumulated. Regular decontamination maintains the paint’s smoothness and ensures any protective coatings you apply bond properly to a clean surface.
Do I need to polish my car after decontamination?
Polishing after decontamination is optional and depends on your paint’s condition. If decontamination has removed surface contaminants but your paint still has swirl marks or oxidation, light polishing can improve the finish. However, if your paint is already in good condition, you can proceed directly to applying a ceramic coating or paint protection film. Skipping unnecessary polishing reduces the risk of paint damage and saves time, especially if your goal is simply to prepare the surface for protection treatments.